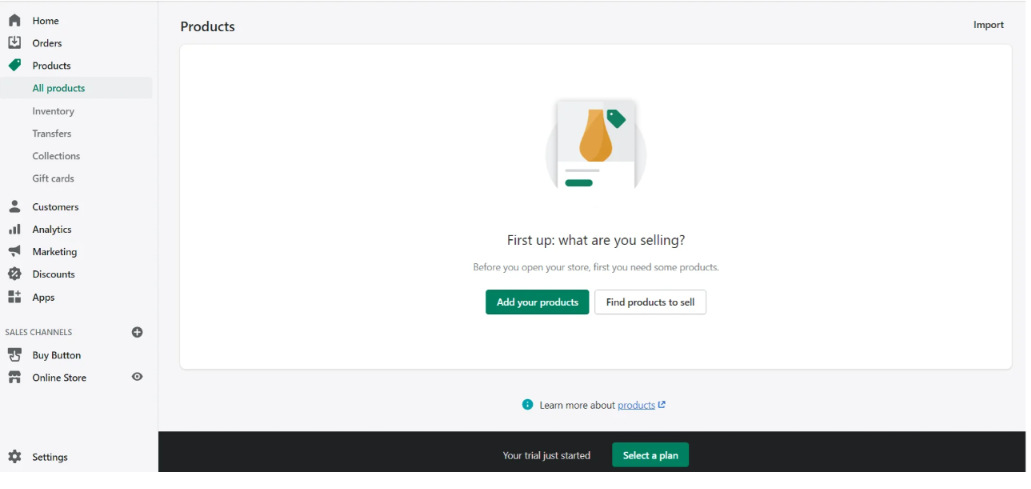
If you're looking to start selling products on Shopify, you're in the right place. In this article, we'll show you how to add products to your Shopify store. We'll also cover some tips for getting your products online and ready to sell. Let's get started!
Adding products on Shopify is a simple process that can be completed in just a few steps. This guide will walk you through everything you need to do in order to add new products to your shop.
The first step is to login to your Shopify account. Once you are logged in, you will be taken to your shop's dashboard.

Next, you will need to write the product details for each product that you want to add. This includes the name, description, price, and other relevant information. Be sure to fill out all of the fields completely and accurately.
Title: try and make this a short and memorable title that will serve as a product name. Remember though,that your product title does not necessarily need to contain all information about your product. Also, try and make your titles consistent throughout your store. For example, if you inflcude the color in your titles, do the same for all on your shop.
Description: the description is where you appeal to your customers providing them with reasons to add products to their carts. When creating product descriptions, try and keep in mind your target audience and think about how your product will help them.
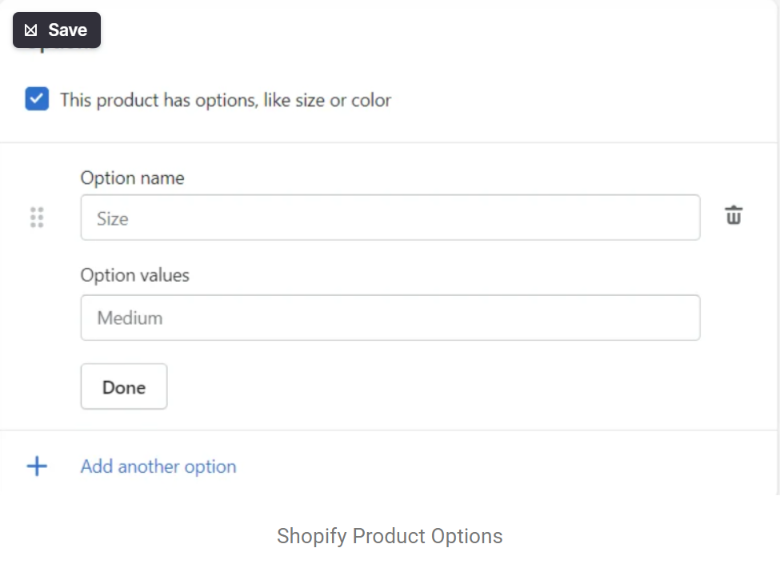
Options: if your product has other options such as size or color, you can click the “this product has options” box and fill in the necessary information. You may even add values for each option which you may use to detail what options you offer for a particular product.
Vendor: this is where you write your brand name if you sell original, homemade products or the name of the supplier or manufacturer.

After the product details have been filled out, you will need to add images for each product. To do this, simply click on the "Add Images" button and upload the photos that you want to use. Here are some tips to keep in mind when adding images:
If you want to group your products together, you can create a collection on Shopify. To do this, click on the "Collections" tab and then click on the "Create Collection" button. Enter a name for your collection and then select the products that you want to add to it.
There are two types of collections you can add on Shopify” manual and automated
Manual collections require you to decide which collections each product belongs to. Think of collections as categories where you can include multiple products.
Automated Collections: this type of collection is automated by Shopify based on specific conditions.
There are a few other settings that you can adjust for each product on Shopify. To access these settings, click on the "Products" tab and then click on the product that you want to edit. From here, you can change the price, inventory, shipping, and more.
Here are some settings that you need to pay attention to::
Pricing
Pricing is one of the most critical settings that you should pay attention to when adding products on Shopify. When setting prices, also consider Discounts or discount codes that allow customers to get discounts when certain conditions are met.
Shipping
It is crucial that you set up your shipping before receiving your first order. Shopify offers three selections: local delivery, local pick-up, and shipping. You may also decide to limit the available shipping options depending on your products or business type.
Product Reviews
Shopify also offers a customer review feature which allows customers to leave honest reviews and help you earn trust.
One of the most important things to do when adding products on Shopify is to optimize them for search engines. This will help potential customers find your products more easily. There are some effective ways you can do this:
After you have completed all of the steps above, your products are now ready to be published. It is wise to review all the information and make sure it is accurate before publishing your items. To do this, click the “Save Product” button.
Then, click the “View on your website” option to see how your listing looks on the live site. If you need to make any changes, you can edit by returning to the first step.
If everything looks good, simply click on the "Publish" button for each product.
Related: Ultimate Guide To Coupons And Promotions For Amazon
Customizing your product pages on Shopify is a great way to make your store stand out and give customers a more personalized experience. There are a few different ways you can customize your product pages, which we'll cover below:
1. Add custom tabs to your product pages
2. Change the layout of your product pages
3. Add additional sections to your product pages
4. Use third-party apps to customize your product pages even further
Let's take a closer look at each of these methods:
Related: How Do You Make Your Shopify Store Look Professional?
Custom tabs allow you to add extra information to your product pages that might not fit in the standard description area. This could be things like size charts, FAQs, or care instructions. To add a custom tab to your product pages, go to the "Products" tab in your Shopify dashboard and click on the product you want to edit. Then, click on the "Add Tab" button and enter a name and description for your custom tab.
By default, Shopify uses a certain layout for all product pages. However, you can change this if you want to customize the look of your pages. To do this, go to the "Themes" section of your Shopify dashboard and click on the "Customize" button for your theme. From there, you'll be able to change the layout of your product pages by selecting a different "Product Page" template.
In addition to the standard description area, you can also add extra sections to your product pages. This could be things like customer reviews, related products, or even a video. To do this, go to the "Products" tab in your Shopify dashboard and click on the product you want to edit. Then, scroll down to the "Additional Information" section and click on the "Add Section" button. From there, you'll be able to choose from a variety of different types of sections to add to your product page.
There are a number of different apps available that allow you to customize your product pages even further. These apps can add things like extra tabs, social sharing buttons, or customer reviews. To find these apps, simply search for "product page customization" in the Shopify App Store.
By following these steps, you can easily customize your product pages on Shopify to better match your brand and give customers a more personalized experience. Experiment with different layouts, colors, and content to find what works best for you and your store.
Related: 9 Best Shopify Apps For Clothing Store
Once you've added your products to Shopify, it's time to set up pricing and inventory. This can be done in the "Products" section of your Shopify dashboard. Simply click on the product you want to edit and scroll down to the "Inventory" section. From there, you'll be able to enter your desired price and set the available inventory for that product.
You can also choose to have Shopify automatically track your inventory for you. To do this, simply select the "Track quantity" option in the "Inventory" section and enter a number for the "Quantity" field. Then, when someone purchases one of your products, Shopify will automatically reduce the available quantity by one.
If you're selling products that come in different variants (like size or color), you can also set up pricing and inventory for each variant. To do this, go to the "Products" section of your Shopify dashboard and click on the product you want to edit. Then, scroll down to the "Variants" section and click on the "Edit" button next to the variant you want to change. From there, you'll be able to enter a new price and quantity for that variant.
By following these steps, you can easily set up pricing and inventory for your products on Shopify. Be sure to experiment with different prices and quantities to find what works best for your store.
There are a number of different things you can do to increase online sales. Here are a few tips to get you started:
One of the most important things you can do to increase online sales is to use high-quality product photos. Customers want to see what they're buying, so make sure your photos are clear, bright, and professional looking.
Related: 5 Tips for Effective eCommerce Photography
In addition to using great photos, you also need to create compelling product descriptions. Your descriptions should be clear, concise, and interesting. They should also be keyword rich so that they show up in search engine results.
Customers love getting a good deal, so offer discounts and coupons whenever possible. You can offer discounts on your products, shipping, or even on your entire order. Just be sure to keep an eye on your margins so that you're still making a profit.
Social media is a great way to promote your products and increase online sales. Be sure to post about your products on a regular basis and interact with potential customers who are interested in what you have to offer.
Finally, make sure it's easy for customers to pay for your products. Use a payment processor like PayPal or Stripe so that customers can pay with their credit cards. You should also offer a variety of shipping options so that customers can choose the option that's best for them.
By following these tips, you can increase online sales and take your business to the next level. Experiment with different marketing strategies and see what works best for your store.
Now that you know how to add products from other websites to Shopify, it’s time to start stocking up on inventory! Just be sure to keep the following tips in mind when choosing products to sell on Shopify. Need help fulfilling your orders? Get in touch with Simpl today and we’ll take care of everything for you.
Recommended: How Much Does It Cost To Start A Shopify Store?